Definitive 2020 guide on hosting multiple Ghost blogs on one Digital Ocean droplet
If you're struggling to find a clear and straightforward way to host multiple Ghost blogs on one server. I want this to be the definitive and simple guide on how to do that.
I had a very interesting experience trying to host multiple Ghost blogs on a single server. When I did a google search on this exact topic, a ton of tutorials come up so I had the utmost confidence that this would be a simple task that I can get done in 10 minutes. After 9 hours, starting from 10pm then staying up all night due to drinking too much coffee and finally completing the task at 7am I realized that I had to wade through a lot of blog tutorials that came up through Google search on "how to host multiple Ghost blogs on a single Digital Ocean VPS" and a lot of them were copy pasted instructions from old tutorials.
I read through this one, this one, and even this one. I browsed through digital ocean forums looking to trouble shoot various issues I experienced when going through the various aforementioned blog tutorials. I thought this would help but in hindsight it turned out to lead me down a rabbit hold and overly complicated things compared to the solution I am about to share.
If you're struggling to find a clear and straightforward way to host multiple Ghost blogs on one server. I want this to be the definitive and simple guide on how to do that.
Starting from the beginning, I recommend registering the domain names for your blogs. I chose to use NameCheap because they offer .dev as a top level domain. Then you want to go to create a Digital Ocean account if you have not done so already. Once you enter your dashboard, you might be prompted to create a project, take the time to create one now and after that you want to create a droplet through the create dropdown in your dashboard.
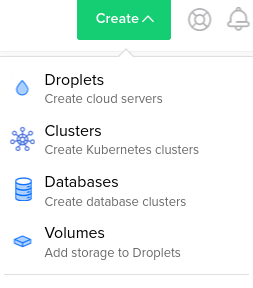
I chose the Ubuntu option and the $5/month plan. Adding your ssh key makes remote configuring the server super easy so I recommend doing that. Those are the things I had to change from the default options. Once you configured the remaining settings to your satisfaction, you can create the droplet.
Take note that I do not recommend going into the Digital Ocean marketplace and using the Ghost droplet that's provided. The reason is because it works fine if you will be hosting a single Ghost blog on that droplet but becomes a lot more difficult to host another blog on the same server later.
Once your droplet is finished deploying, you want to copy the IP address listed for for Digital Ocean droplet and update your DNS to point towards it by adding a DNS entry in your domain registrar's website. This is a very important step that can not be skipped.
Now you can follow Ghost's own server setup documentation that outlines in a very straightforward manner all the steps needed to create a blog. The documentation is more up to date than all of the blog tutorials that I was browsing through and provided a very seamless experience. The only thing I did differently from this step in the documentation was naming the directory fullstackgjj.com so it looked like /www/var/fullstackgjj.com instead of /www/var/ghost because I plan to have another folder in /www/var to hold my other blog
After you follow the steps to create the first blog, you can then create another directory in /www/var to hold the folder that is named after your second blog, mine looked like /www/var/rustydeveloper.dev. You then want to follow the normal steps of authorizing it for modification by your user name, cd into it, and then execute the command ghost install and the ghost-cli will take care of the rest just like it did for the first blog.
Hopefully this helped you on your way to hosting multiple Ghost blogs on one server and averted the struggle that I had to endure.